Nginx + Apache Tomcat 9 on Ubuntu 18.04

This tutorial will help you to install and configure Tomcat 9 along with Nginx server as reverse proxy on Ubuntu 18.04. You can follow same tutorial on any Ubuntu-based distribution, including Ubuntu 16.04, Linux Mint and Elementary OS
Prerequisites
To be able to install packages on your Ubuntu system, you must be logged in as a user with sudo privileges.
Step 1: Install OpenJDK
Tomcat requires Java to be installed. We’ll install OpenJDK, which is the default Java development and runtime in Ubuntu 18.04.
Begin by updating the package index:
sudo apt updateInstall the OpenJDK package by running:
sudo apt install default-jdkStep 2: Create Tomcat User
For security purposes, Tomcat should not be run under the root user. We will create a new system user and group with home directory /opt/tomcat that will run the Tomcat service:
sudo useradd -r -m -U -d /opt/tomcat -s /bin/false tomcatStep 3: Install Tomcat
We can download the latest binary release from Tomcat 9 downloads page.
At the time of writing, the latest version is 9.0.33. Before continuing with the next step, you should check the download page for a new version. If there is a new version, copy the link of the Core tar.gz file, which is under the Binary Distributions section.
Start by download the Tomcat archive in the /tmp directory using the following wget command:
wget https://downloads.apache.org/tomcat/tomcat-9/v9.0.33/bin/apache-tomcat-9.0.33.tar.gz -P /tmpOnce the download is complete, extract the Tomcat archive and move it to the /opt/tomcat directory:
sudo tar xf /tmp/apache-tomcat-9*.tar.gz -C /opt/tomcatTo have more control over Tomcat versions and updates, create a symbolic link called latest that points to the Tomcat installation directory:
sudo ln -s /opt/tomcat/apache-tomcat-9.0.33 /opt/tomcat/latestLater if you want to upgrade your Tomcat instance, simply unpack the newer version and change the symbolic link to point to the latest version.
As we mentioned in the previous section Tomcat will run under the tomcat user. This user needs to have access to the tomcat installation directory.
The following command changes the directory ownership to user and group tomcat:
sudo chown -RH tomcat:tomcat /opt/tomcat/latestThe scripts inside bin directory must have executable flag:
sudo sh -c 'chmod +x /opt/tomcat/latest/bin/*.sh'Step 4: Create a systemd Unit File
To run Tomcat as a service you need to create a new unit file.
Open your text editor and create a file named tomcat.service in the /etc/systemd/system/:
sudo nano /etc/systemd/system/tomcat.servicePaste the following configuration in tomcat.service file:
[Unit]
Description=Tomcat 9 servlet container
After=network.target[Service]
Type=forkingUser=tomcat
Group=tomcatEnvironment="JAVA_HOME=/usr/lib/jvm/java-11-openjdk-amd64/"
Environment="JAVA_OPTS=-Djava.security.egd=file:///dev/urandom -Djava.awt.headless=true"Environment="CATALINA_BASE=/opt/tomcat/latest"
Environment="CATALINA_HOME=/opt/tomcat/latest"
Environment="CATALINA_PID=/opt/tomcat/latest/temp/tomcat.pid"
Environment="CATALINA_OPTS=-Xms512M -Xmx1024M -server -XX:+UseParallelGC"ExecStart=/opt/tomcat/latest/bin/startup.sh
ExecStop=/opt/tomcat/latest/bin/shutdown.sh[Install]
WantedBy=multi-user.target
Modify the value of
JAVA_HOMEif the path to your Java installation is different.
Save and close the file and notify systemd that we created a new unit file:
sudo systemctl daemon-reloadStart the Tomcat service by executing:
sudo systemctl start tomcatCheck the service status with the following command:
sudo systemctl status tomcatOutput
* tomcat.service - Tomcat 9 servlet container
   Loaded: loaded (/etc/systemd/system/tomcat.service; disabled; vendor preset: enabled)
   Active: active (running) since Wed 2018-09-05 15:45:28 PDT; 20s ago
  Process: 1582 ExecStart=/opt/tomcat/latest/bin/startup.sh (code=exited, status=0/SUCCESS)
 Main PID: 1604 (java)
    Tasks: 47 (limit: 2319)
   CGroup: /system.slice/tomcat.servic
If there are no errors enable the Tomcat service to be automatically started at boot time:
sudo systemctl enable tomcatStep 5: Adjust the Firewall
If your server is protected by a firewall and you want to access Tomcat from the outside of your local network, you need to open port 8080.
To allow traffic on port 8080 type the following command:
sudo ufw allow 8080/tcpStep 6: Configure Tomcat Web Management Interface
Now that Tomcat is installed and running, the next step is to create a user with access the web management interface.
Tomcat users and roles are defined in the tomcat-users.xml file. This file is a template with comments and examples describing how to configure the create a user or role.
sudo nano /opt/tomcat/latest/conf/tomcat-users.xmlTo add a new user with access to the Tomcat web interface (manager-gui and admin-gui) we need to define the user in the tomcat-users.xml file, as shown below. Make sure you change the username and password to something more secure:
/opt/tomcat/latest/conf/tomcat-users.xml
<tomcat-users>
<!--
    Comments
-->
   <role rolename="admin-gui"/>
   <role rolename="manager-gui"/>
   <user username="admin" password="admin_password" roles="admin-gui,manager-gui"/>
</tomcat-users>
By default Tomcat web management interface is configured to restrict access to the Manager and Host Manager apps only from the localhost.
If you want to be able to access the web interface from a remote IP, you will have to remove these restrictions. This may have various security implications, and it is not recommended for production systems.
To enable access to the web interface from anywhere open the following two files and comment or remove the lines highlighted in yellow.
For the Manager app, open the following file:
sudo nano /opt/tomcat/latest/webapps/manager/META-INF/context.xmlFor the Host Manager app, open the following file:
sudo nano /opt/tomcat/latest/webapps/host-manager/META-INF/context.xmlcontext.xml
<Context antiResourceLocking="false" privileged="true" >
<!--
  <Valve className="org.apache.catalina.valves.RemoteAddrValve"
         allow="127\.\d+\.\d+\.\d+|::1|0:0:0:0:0:0:0:1" />
-->
</Context>
Another option is to allow access to the to the Manager and Host Manager apps only from a specific IP. Instead of commenting the blocks you can simply add your IP address to the list.
For example if your public IP is 45.45.45.45 you would make the following change:
context.xml
<Context antiResourceLocking="false" privileged="true" >
  <Valve className="org.apache.catalina.valves.RemoteAddrValve"
         allow="127\.\d+\.\d+\.\d+|::1|0:0:0:0:0:0:0:1|45.45.45.45" />
</Context>
The list of allowed IP addresses is a list separated with vertical bar |. You can add single IP addresses or use a regular expressions.
Remember to restart the Tomcat service each time you edit Tomcat configuration files for changes to take effect:
sudo systemctl restart tomcatStep 6: Test the Tomcat Installation
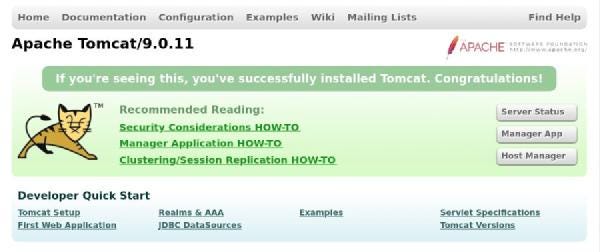
Open your browser and type: http://<your_domain_or_IP_address>:8080
Assuming the installation is successful, a screen similar to the following should appear:
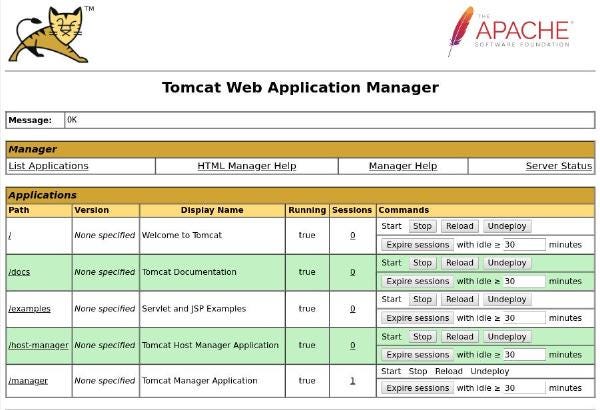
Tomcat web application manager dashboard is available at http://<your_domain_or_IP_address>:8080/manager/html. From here, you can deploy, undeploy, start, stop, and reload your applications.
You can sign in with the user you have created in Step 6.
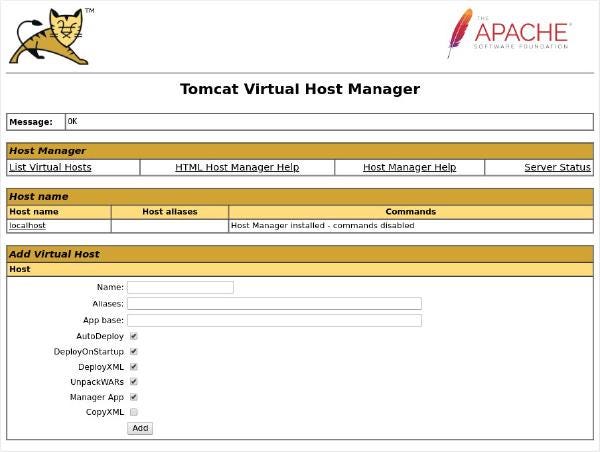
Tomcat virtual host manager dashboard is available at http://<your_domain_or_IP_address>:8080/host-manager/html. From here, you can create, delete and manage Tomcat virtual hosts.
Step 7: Configure Nginx as a Reverse Proxy
Next, you will need to configure Nginx as a reverse proxy to proxy request coming on port 80 to 8080. First, install Nginx server by running the following command:
apt-get install nginx -yOnce installed, create a new virtual host configuration file for your application with the following command:
nano /etc/nginx/sites-enabled/defaultAdd the following lines:
server {
        listen 80;
        listen [::]:80;location /hello {
             proxy_pass http://localhost:8080/examples/servlets/servlet/HelloWorldExample;
             proxy_set_header X-Forwarded-For $proxy_add_x_forwarded_for;
             proxy_set_header X-Forwarded-Proto $scheme;
             proxy_set_header X-Forwarded-Port $server_port;
        }
}
Save and close the file. Then, restart Nginx service to apply all the configuration changes with the following command:
# systemctl restart nginxTest Your Application
Spring Boot application is now installed and configured with Nginx. You can access it by visiting the URL http://<your_domain_or_IP_address>/hello on your web browser. You should see your application on the following page: